


 |
| And, arent these colors gorgeous together? 8mm fire polish, silver spacers, wood oblongs, wood multi angle cut spacers and lots of needle pricks in my fingers later... I wanted to toss this bracelet across the room a couple of times. The thread I chose was thicker than I thought, and it did not want to go through most of the beads twice, so I struggled each time. Ahhh, at least the end result was worth the swearing, sore fingers and bleeding... :) I learned to make my first leather wrap bracelet at where else? Bead Street of course! |
 |


 |
| Love the milky colorations and specks of color on these 8mm Czech petals. I used three different colors, all from BeadStreet |
 |
 |
| I added a brass flower button for my closure with peyote stitch loop (of course)! |
 |
| The bricks show nicely underneath, and enough through the top to give that added pop of color. |

 |
| MY FALL COLORS adorn this wonderful pattern. A class at Bead Street taught by Sandy, using an Adele Kimpell pattern, "Lentille Bracelet". This was my second bracelet - my first is below. On this version I took it down a slightly different path, using both two hole Czechmate lentils in the shiny bronze, and a variety of fall colored super duos. It's yummy if I don't say so myself. The herringbone tube-like pattern was very fun, and since I had struggled with this stitch on a previous project, I had it down this time! I used a multi-mix tube of matte 11.0 seed beads in copper/yellow tones and shiny gold (permanent finish) 11.0's down the center for a little pop. |

 |
| My closure is a leather button with peyote stitched loop. Here's the FIRST bracelet I made, below. I wanted to try something slightly different and even though I'm in a fall color mode, I chose cooler colors for this project, starting with the purple metallic (permanent) 11.0's, and the metallic purple/blue mix lentils. The whole time I was working this bracelet I wasn't sure I liked the combo until near the end. I wanted to try a different closure, so transitioned from the herringbone to peyote stitch, then used a button and peyote stitched loop. I must say, I had to tear out this small section over and over and yes, over again, because it wouldn't lay right. It was a challenge, but in the end... yes, I love this one too. Isn't the button oh so cute? |


 |
A wonderful pattern designed by Adele Kimpell, Bead Dreamers, (tweaked and embellished slightly) which I learned in a class taught by Sandy Taylor at Bead Street. This is my second [completed] bracelet using 8sb's (reddish/rust color) for the tubular Herringbone base, with three different colored lentels (dark green, translucent/opaque yellow and the gorgeous orange with gold flecks, my favorite). I added some copper 11s down the middle of the base as a finishing touch. |
 |
Another front view - this shows the translucent side of the yellow lentels. |
 |
Back view-- I did not add the copper 11 embellishment to this side. It is more comfortable to wear without the added beads next to the skin. Also, you can see the other side of the yellows - the opaque coating. |
 Here's the first bracelet I completed - I say that because the original pattern used 11's for the Herringbone tube base, but my eyes have not been cooperating and I just couldn't see the beads to get it started - four beads for a tube was challenging for me! So, that one sits on my beading table. I will finish it, but for right now, the bigger seed beads are fun - I like the flash of color on my wrist. Doesn't this color combo remind you of cornucopia? |
  |
 |
| I think this Fall mix of rustic 8sb is so yummy and versatile. This tube has been sitting in my stash of 8s and I've used a little of it here and there, but never all in one piece. I think it's a statement in itself. As I near the end of this type of project, I ponder how best to finish it so it looks professional. This necklace gave me some pause, and some more pause, and then some more. I wanted the end to look as pretty as the beginning and the middle. So, it sat on my beading table for many many days... sometimes it's a little intimidating, so I move on to something else and let it sit. But, once it came to me, it became fun. I stitched three loops of about 24 11s, then added a couple jump rings to those loops. Then I started embellishing from the end of the Herringbone over those beaded loops (circular peyote stitch) and the jump rings to the start of the chain. I used 8s, 11s and Miyuki drops and then a few 15s interspersed to include a little red in what became a beaded bead and voila... all of the worker beads were hidden! I am happy with the result, especially since I had no idea how it would turn out :) |


 |
| I added one of my crystal heart pendants via large jump rings to the necklace so I can take it on and off easily. Ooh la la. It's nice. |
 And, here are the earrings from my last post, that make this a nice set! The bronze metal is a nice warm meshing with the Fall colors of the beads.
 |
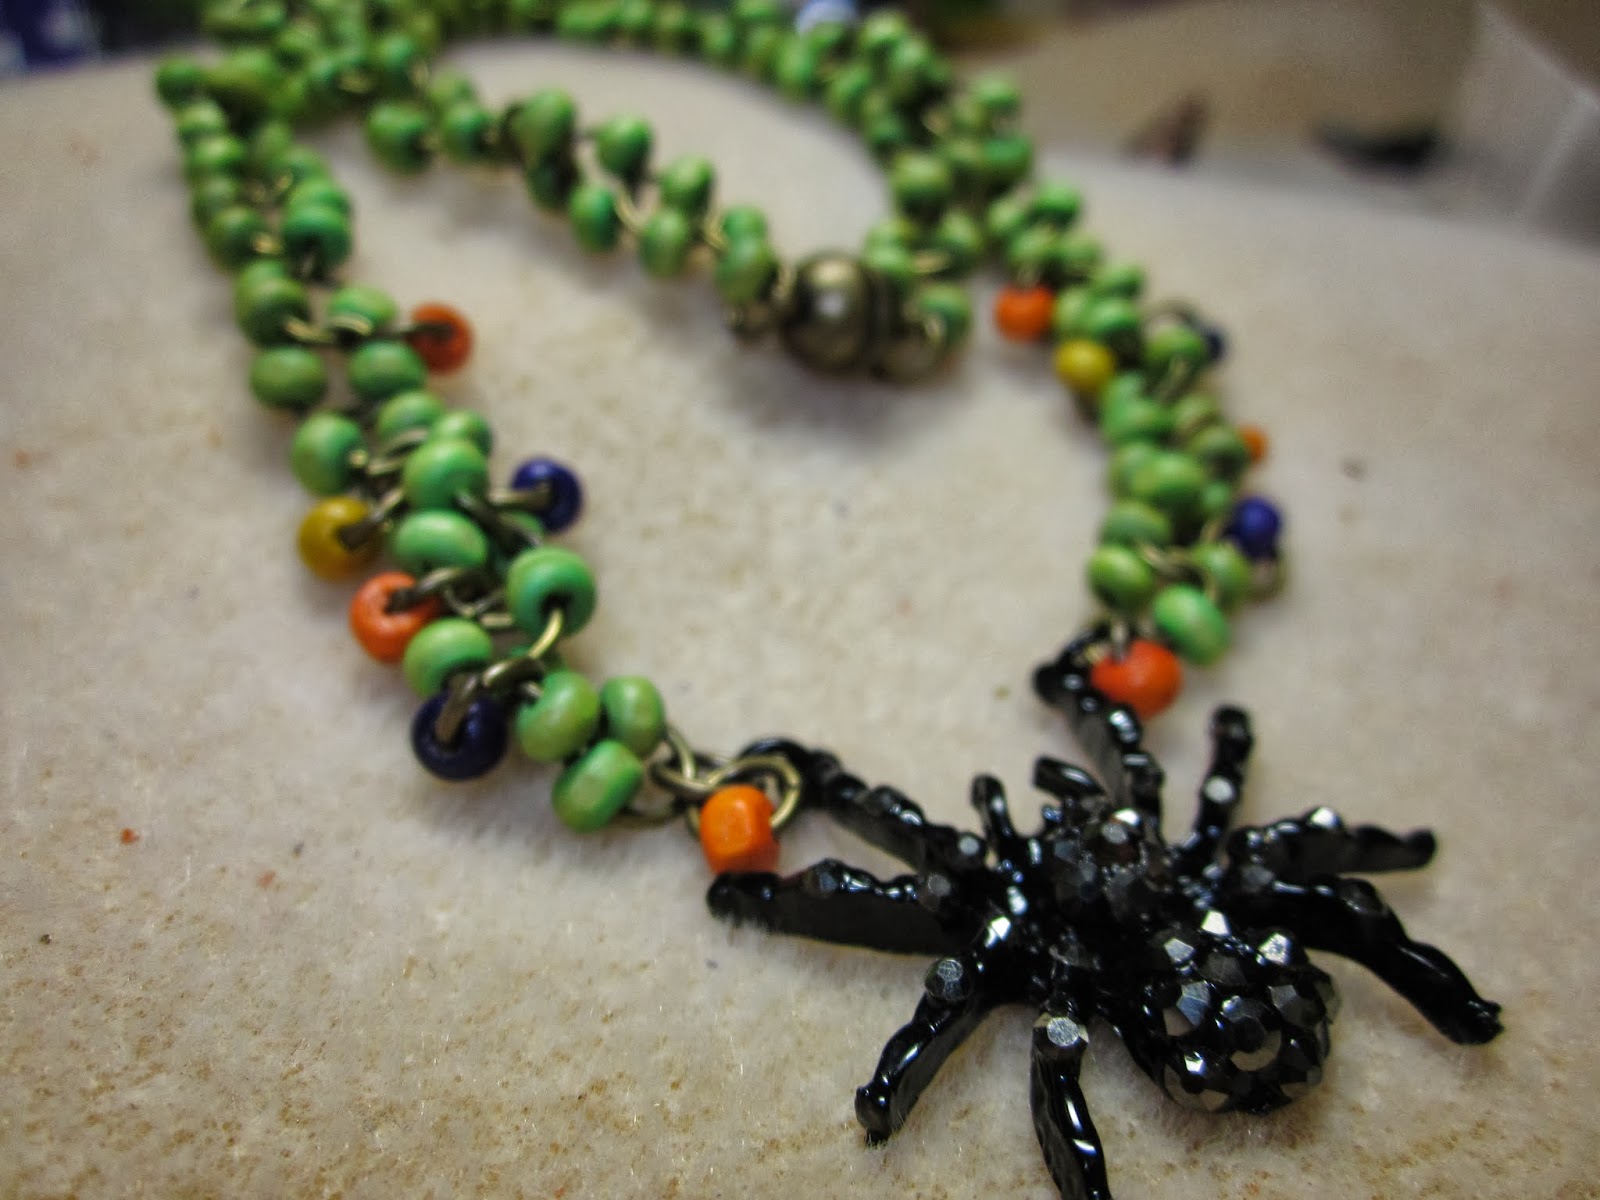
| I love September because that means Fall is basically here and it's almost HALLOWEEN. I think Fall is my favorite time of year as the nights get cooler - whew is that a nice change here in Boise! Unfortunately, that means the days get shorter too - but I have good lighting at my beading table, so decided I'd get to work on something light and fun for this new Season! Ahhh big seed beads, and wood ones at that. Like it! I started with the spider - "He" screams Fall and Halloween. I'm afraid of real spiders, but of course, glass I can handle! I loved him the minute I saw him - small crystals adorn his body so he sparkles. oooooh, scarey! I attached him to jump ring chain filled with green wood 6mm sbs, then added a few orange, purple, and yellows to spruce it up. A fun, quick project and with one quick snap of the magnet, off I go... |



 These are just soooo easy
and fun. I bought the earring metal rounds ready-made, threaded on some 6 sb,
(it took me going through many many beads to find those with a hole large
enough to slide onto the metal) and 6mm fp in the center (with small dainty
beadcaps) and the final touch... small heart charms. There will
be more revealed in my next post relative to these earrings. They really go with a
different necklace of spiral herringbone, but I forgot to take a picture, so
next time…
These are just soooo easy
and fun. I bought the earring metal rounds ready-made, threaded on some 6 sb,
(it took me going through many many beads to find those with a hole large
enough to slide onto the metal) and 6mm fp in the center (with small dainty
beadcaps) and the final touch... small heart charms. There will
be more revealed in my next post relative to these earrings. They really go with a
different necklace of spiral herringbone, but I forgot to take a picture, so
next time… 


